Solar Dehydrator Project: Part the Last...

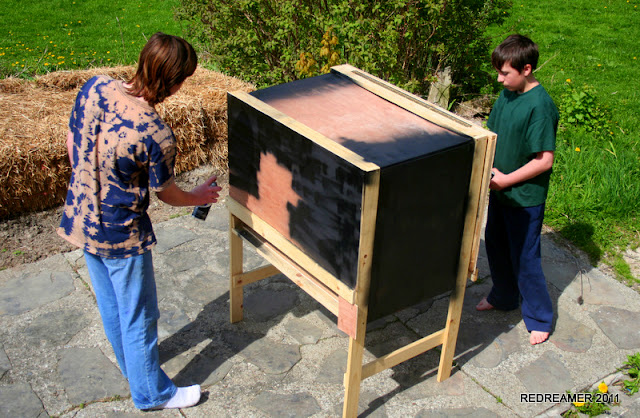
So last job we did was make the box waterproof.... and while we only got a very thin layer of paint on since we ran out... it will help protect the wood until we get some more today. We also considered that painting it black would add to it's thermal quality and make it slightly hotter inside...


Relocated it off the veranda into it's place of function next to the kitchen garden... we wanted it to have the ability to be moveable as the sun moves when in use. We have catnip drying inside at the moment as a first trial. 


Today we hit a new Maximum temperature inside the unit... :) and are still deciding if we need to add a fan to move the air around.... to even out the temperatures inside. Of course it will be solar powered. We have the panel.... we just have to locate where we put the fan... 


Solar Dehydrator Project.Part Five: Making the dehydrator cabinet shelving.

Today the last job of all to wrap up the making the Solar Dehydrator is to make the shelving. We actually are using tomato stakes for the frames after a sanding down to remove any roughness in the wood and slightly bevel the corners for smoother gliding....


Solar Dehydrator Project.Part Four: Making the dehydrator cabinet cladding.

One of the first things we needed to do was as a science/mathematics home school project was measure the panel sizes to cover the framework.

We used 3 ply panelling we had left over from building the chicken house in the barn..... set up the jig saw and two cordless drills. One as a screw driver and one to drill holes. First job before cladding the framework was to put the shelf supports in so we could manoeuvre the drill without any restrictions from the outside walls. We actually used tomato stakes cut up for the job at two foot lengths.


Originally i had 5 square foot of dehydrating space in my electric dehydrator. I now have 42 square feet of drying space. No comparison... and if you grow a garden and dehydrate you KNOW that is a very small volume for when the crops are in. Therefore instead of spending a great deal of money and the ongoing cost of electricity to power it.. i thought it a good opportunity to invest time into a way to dehydrate that would be far more sustainable in the long term.

Not only that but we have also no running costs.

No electrical power needed to run this low tech way of preserving food.

Tomorrow's task is to make the back doorway and we have decided that we would be better off purchasing a piano hinge to take advantage of the large opening without being concerned with limitations to access.

Photo's to follow.

Btw we bought tomato stakes to use as shelf supports/shelf framework and total cost so far is $30.

Solar Dehydrator Project.Part Three: Making the dehydrator cabinet frame.

With $12 worth of pine timber we set about constructing the Cabinet for the dehydrator.

So far this is what we have.


Solar Dehydrator Project.Part two.Box Complete.


Half way there making the tubes out of the cans. Ours measured 8 cans per tube and we made 12 tubes..... and we ended up only needing 11 because we forgot in our estimating to allow for the intrusion of the wooden frame INSIDE the outer edge of the polycarbonate sheeting. So 88 cans in total for the whole project... collected slowly over winter... total cost.... well less than $5 if we had returned them for recycling.


ALL the cans arranged inside the frame.


Drew putting on the back of the box..... cut to the same size we reused some old plywood paneling,


Jye hammering the small nails onto the back to attach the plywood to the frame it took a bit of concentration and the nails were small.


Drew adding nails to the back too. Pretty deft with the hammer. 


Here the boys are using hand files to take off any burrs left behind after cutting out the holes with the hole saw. Cutting out the holes with a cordless (WITH a fully charged battery) took a little while but we measured out the spacing and cut them out... going through BOTH fully charged batteries to do the 11 holes. It would have been better to do it using a corded drill ... but the only one we have would risk wrist wrenching its a little too powerful for the job and hole saw bits can grab unexpectedly so it was a trade off of speed for safety.


We took it outside even though it was too cold for the paint to dry .... just for the application and because of 
fumes. We left it to get tacky dry then moved it under the back veranda roof in case it rained.


Next Step is to add the polycarbonate cover and the base plate....which means another 11 holes to drill tomorrow which will be the last major task.....  we had to wait for drills to recharge but all in all it was a productive day.  The cold damp weather is making drying of glue a little longer than might have been usual.... today it was 33f ALL DAY. 

and today we added the polycarbonate top and the air out frame.


We are VERY VERY happy with this result....... Now to build the cabinet for the dehydrating.... Stay tuned.

Sustainable Chicken Grit.

One of the things about sustainability is that you reduce waste and reduce inputs and re purpose waste as a positive element in the system of whatever it is you are doing.

One of the things we do with our chickens is save the eggshells and when baking in the oven we add a tray of used eggshells to bake out any moisture and dry out the shells. Duck or chicken it makes no difference.


So after we bake the eggshells in the oven....... this is what they look like. The next stage is to put them in the mortar and crush them and fit about 8 egg halves into the mortar........


Then with the pestle we crush them to make them palatable for chickens and ready to add to their food.